前言
openSUSE,目前在 DistroWatch 上的「網頁參觀排名」是第 9 名,今天要來紀錄 openSUSE Leap 15.5 安裝與設定嘸蝦米輸入法的過程。 
安裝 fcitx5-table-extra,啟用嘸蝦米輸入法
用 YaST 搜尋關鍵字:
fcitx5。
由於我只要嘸蝦米輸入法,所以直接勾選
fcitx5-table-extra這支套件,並且讓 YaST 把相依套件都納入本次安裝過程。


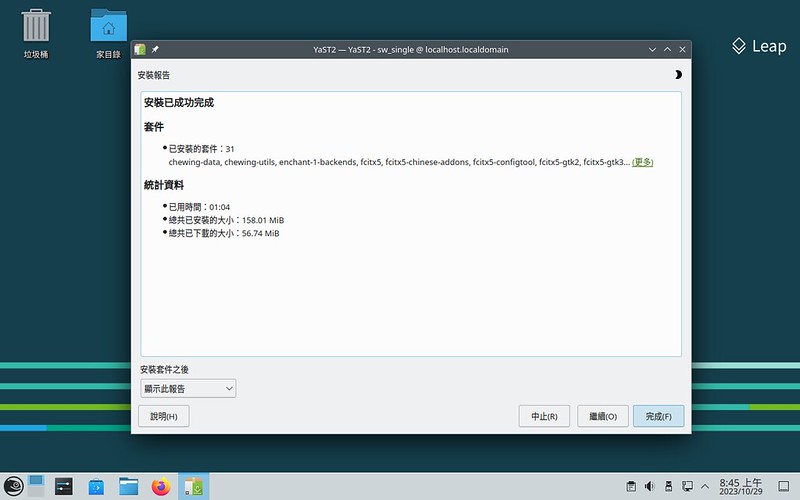
安裝好之後,重新啟動系統。
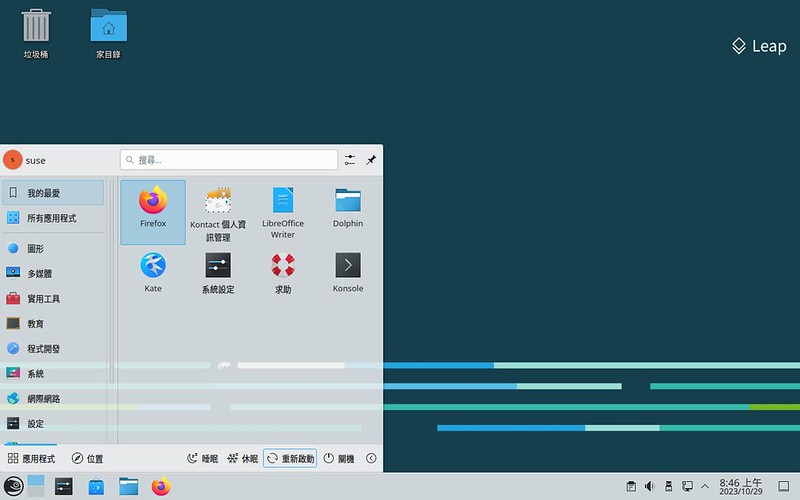
與 openSUSE Tumbleweed Snapshot20231018 不太一樣的地方,就是同樣的安裝過程,Fcitx5 在 Leap 15.5 上完成安裝與重新啟動系統後,並不會自行載入。而,這一個狀況是很好解決的,只要跑一趟「蜥蜴頭開始功能表」→「系統」,找到「Fcitx 5」,給它點下去之後,就萬無一失,即使重新啟動,Fcitx5 仍舊會載入系統。

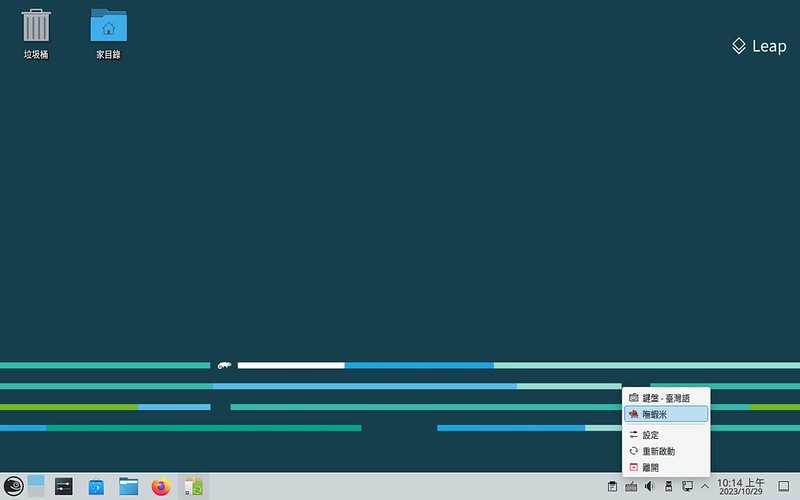
啟動 Fcitx5 之後,要記得跑一趟「設定」,把「嘸蝦米輸入法」加進來。


後記
- 本次安裝使用的 ISO 檔版本是 openSUSE-Leap-15.5-DVD-x86_64-Build491.1-Media.iso。
- 隨著
fcitx5-table-extra這支套件被各個發行版的軟體倉庫收納,普及度越來越高,我自己在使用上,只有打字輸入,並沒有感受到 fcitx(4) 與 Fcitx5 兩個版本之間的顯著差異,由於新版的 Fcitx5 在使用上並有遇到太多的狀況與問題,因此,如果能夠使用較新版的 Fcitx5 時,我自然會選擇較新的版本。